

If you needed another excuse to spray herbicides to kill all the weeds in your yard, here’s a great one. Dandelions, which are a weed commonly found in lawns all over, are pretty darn good eating. They are a good source of many essential nutrients and their shiny, yellow flowers make them extremely easy to find. The dandelions can serve many purposes from root to bloom and everything in between. The greens make a savory, nutritional powerhouse of a salad. The root is frequently found on herbal remedies and teas. Plus, the flowers are completely edible as well. You can also turn them into jelly! We’ll go over how you can make dandelion jelly right at home. It’s a perfect way out of something most people don’t want to make anything useful and it’s a very fun activity to do with kids!
Dandelion jelly has a soft, sweet, honey-like flavor, but much more herbal and with a touch of lemon. This is something that will be an excellent remedy for sore throat. It is also good on biscuits or cornbread!
Since ancient times dandelion has been highly valued for its extraordinary healing properties in different national cultures. The unique floral confiture is a wholesome delicacy made from dandelion flowers. Early in May flowers are hand gathered on sunny meadows; carefully selected and then gently cooked without using artificial additives and preservatives. The confiture is the most delicate food with fine floral aroma and gentle sweet savor. The cooled jelly is an ideal summer dessert. Its luteous color and refreshing flavor bring you memories of dawning lights during a cold season.
Related: How to Make Black Garlic For Boosting Your Immune System
Step 1: Harvest Dandelion Flowers
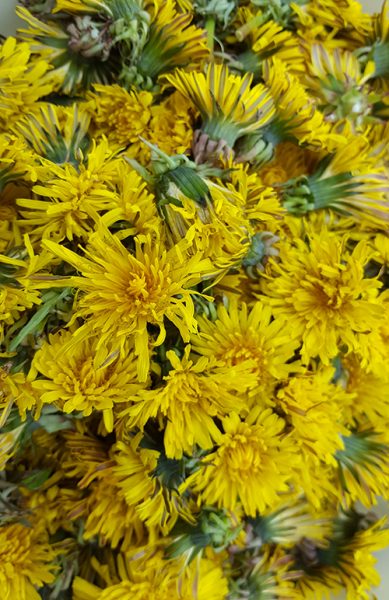
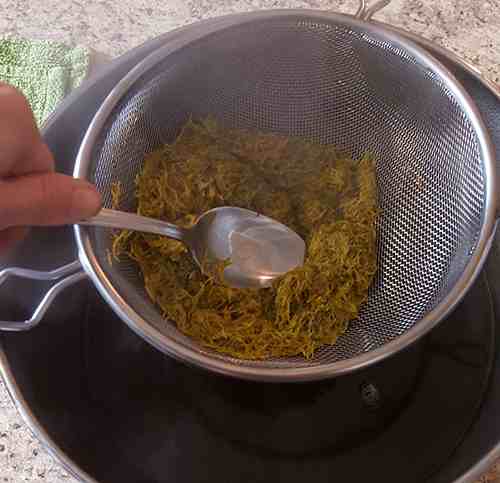
Dandelions can be found quite easily in spring, summer, and fall, although the golden yellow flowers appear to be found at the highest spring concentration. You’re going to need a lot of them to make the jelly, so be prepared to pick a lot! You’ll need one quarter (four cups) of dandelion blossoms, but only the white insides and the yellow petals. Do not bring any of the greenery or milky stems into your blooms. To use with scissors, you can cut them or simply use your hands and separate the petals from the base as pictured.
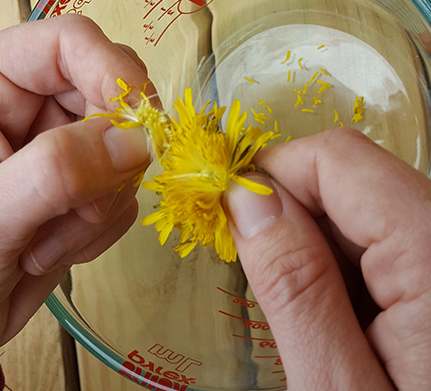
Tips: Avoiding green in your dandelion petals may also help your jelly get a brighter yellow color. The mixture turns green-yellow which looks a bit sickly if you allow greens into the petals of the flowers! Also, using large, open flowers will help you get the required amount faster and it will help you to more easily separate the petals from the greens. Be prepared to have your fingertips stained, too!
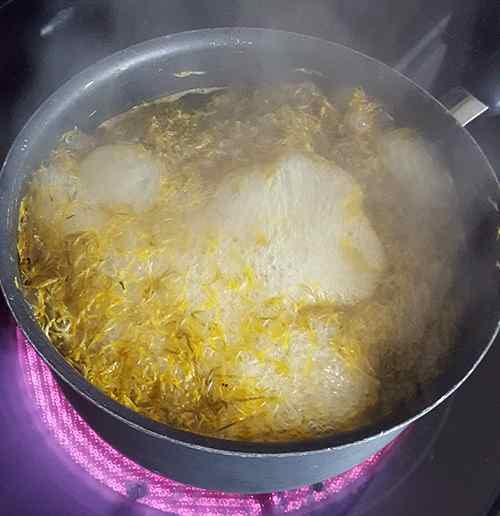
Step 2: Steep the Flowers
There are several methods to steep the flowers, one long and one short. Your jelly’s strength and flavor will vary a little depending on which method you choose – the long method has a milder flavor and a more intense; the short method has a flowery flavor. You’ll need two quarters of water (eight cups) and the four cups of petals, either way.
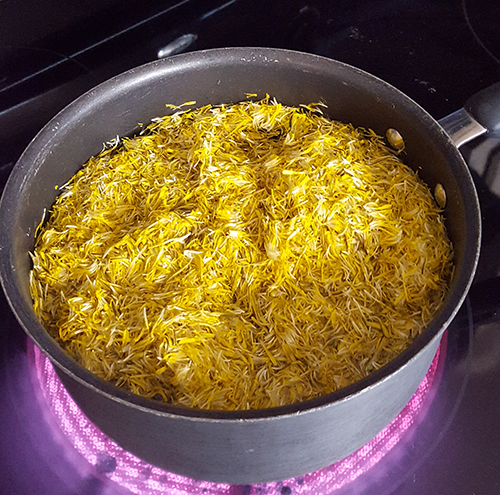
Long method: Pour two quarts of boiling water over four cups of dandelion petals and allow to sit for two to twenty-four hours.
Place the flower petals in a large pot along with 2 quarts of water. Bring the water to a boil and keep it there for ten minutes.
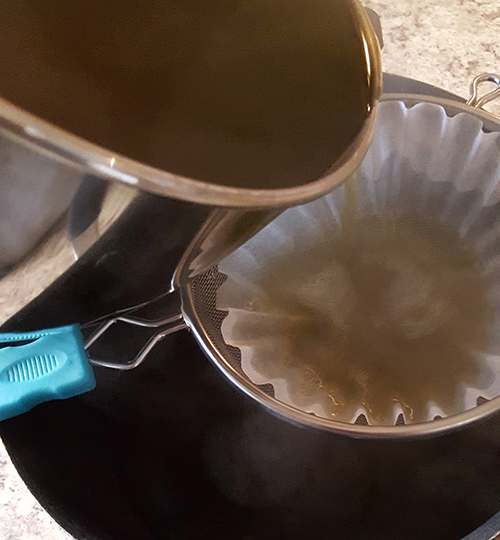
Step 3: Strain
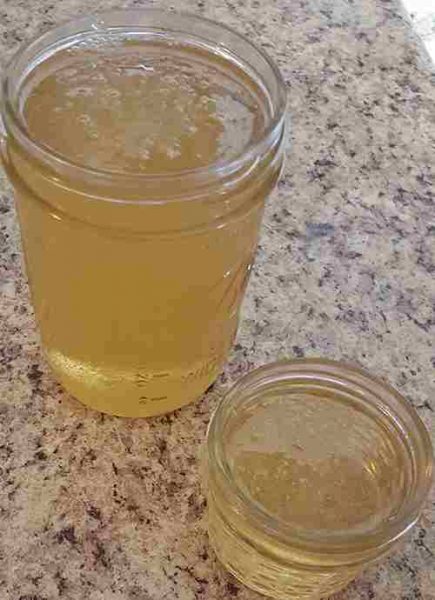
Now, you’ll need to strain the flowers from the water. KEEP THE WATER! That’s what you’ll use to make the jelly.
You can do this in a variety of ways including using a fine wire mesh strainer or cheesecloth. Once initially strained, squeeze the water out of the petals. Strain the water again using a coffee filter to make sure you get out all the solid matter.
Related: Top 8 Deadly Plants in the U.S. – That You Need To Avoid
Step 4: Mix Jelly Ingredients Together
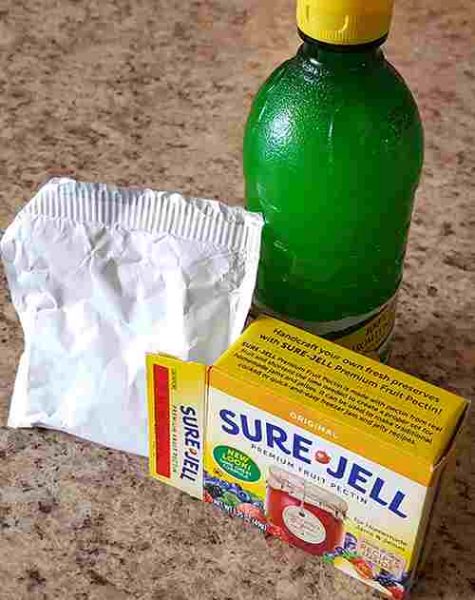
Add the following ingredients to a large pot: 2 tablespoons of lemon juice (fresh or reconstituted will do, and lime will work in a pinch, too!); 1 package (1 ¾ ounce) powdered pectin; and 3 cups of the dandelion liquid.
Step 5: Prepare Jars
While many people don’t choose to water bath or pressure can this jelly; instead inverting the jars full of jelly to create the seal; you will still need to prepare the jars regardless of which canning method you choose to use. You can use a canning jar of any size (or shape) you want. Plan for 7 half pints or 14 quarter pint jelly jars. In the sink, place clean jars and cover them with very hot water. You can also use the sterilize function to heat jars on your dishwasher. Most jar manufacturers don’t recommend using dry heat, like in an oven, heating jars because it can compromise the glass and potentially cause injury.
Related: 10 Medical Home Emergencies and How to Treat Them
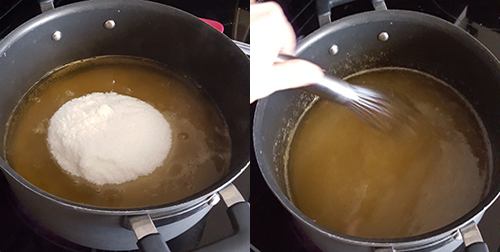
Step 6: Boil, Add Sugar, and Boil Some More
Bring these ingredients to a full boil, then add 5 ½ cups granulated white sugar. Stir well to help the sugar dissolve completely. Boil for an additional 1 ½ minutes, stirring continuously. Check to make sure that the sugar is fully dissolved by dipping in a wooden spoon and watching if the mixture sheets from the utensil.
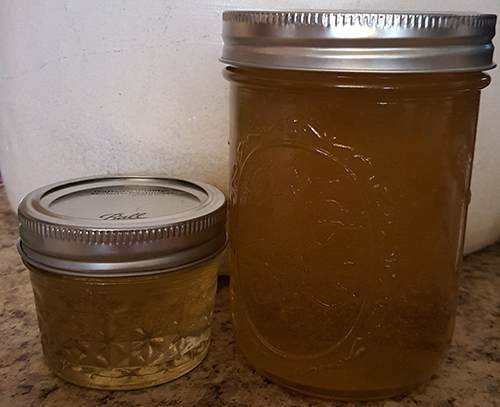
Step 7: Put Jelly in Jars
It’s time to pour your jelly into the hot, clean jars you prepared in Step 5 of this tutorial. Spoon the hot mixture into the jars, leaving 1/8 inch of space at the top. Clean off each jar rim then put the lid and ring in place.
At this point, the jelly can be kept in the refrigerator and used within a few weeks or you can seal the jars so that when properly stored, the jelly can hold for up to one year.
Related: The Hidden Secret of Shepherd’s Purse
Step 8: Seal Jars
Simply flip the jars upside down on a tea towel laid over a hard surface if you choose to use the inversion method for this jelly. Wait about ten minutes and check to see if the jars have been sealed by checking the button in the center of the lid that pulls in when a satisfactory seal is reached. If not, you’ll need to move on to the canning method for water baths or use the jelly within a few weeks.
Follow the USDA guidelines for water bath canning of jams and jellies found here if you choose to use the water bath method. When canned properly, this jelly can be stored for up to two years in a cool, dark area.
Related: Pressure Canning for Preppers
It is absolutely recommended that you go ahead and water bath can any jelly you wish to use more than a couple of weeks from when you make it. If water bath canning isn’t a part of your plan, please consider giving excess jelly away as gifts so that it can be enjoyed within a couple of weeks!


 in Cereal?")

