
Not only is the harvesting of your potatoes in bags a smart way to grow them in small spaces, it can also prolong the harvest time. Additionally, keeping pests and disease away from the spuds is beneficial too. And, that is not a complex process!
In late February or March, when you plant your seed potatoes, you will have a harvest over the summer months and into fall. Or you can plant for the winter months in August, to have a harvest of spuds. Such spuds are also known as “second cropping potatoes”
You can see when to plant in the table below, and use it as a guide on when to grow fresh potatoes.
| Cropping Type | Planting time begins | Final planting date | Harvest from planting date |
| First early potatoes | End of February | Late May | 10 weeks |
| Second early potatoes | March | Late May | 13 weeks |
| Early maincrop potatoes | March | Late May | 15 weeks |
| Maincrop potatoes | March | Mid May | 20 weeks |
| Second cropping potatoes | Early August | End of August | 11 weeks |
Related: Vegetable Garden Planning for Beginners
Chitting Your Potatoes
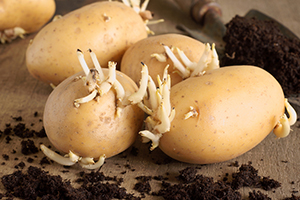
Your seed potatoes will benefit from the process of chitting. That is especially true for early and second earlies.
The cycle includes allowing them to sprout with tentacle-like growths that develop after a while sitting around potatoes, which will help with faster growth and denser crops.
However, this process is not needed for the second cropping potatoes (those planted in August).
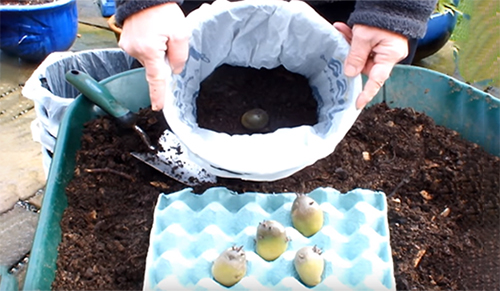
Lay out the seed potatoes in a cool (not freezing) and bright place to help the chitting process along. For this stage some people use empty cartons with eggs. When the chits reach a length of about 1″ the seed potatoes are ready for harvest. Usually they’re about the size of a chicken egg, but they can vary in size.
Keep in mind that you’ll want to plant them with the sprouting end facing up.
Related: Planning Your Homestead Orchard: Benefits of Dwarf Trees
How to Plant Potatoes in Bags
Old school methods will have you plant the potatoes at the bottom of the bag and then add more compost or soil as they expand.
Newer techniques however show that this is not important as long as the soil and compost keep the spuds safe from sunlight.
To plant your seed potatoes in bags follow these steps:
- Fill a bag (about 2 gallon in size) with good quality compost and soil to about 1” below the top of the bag
- Carefully bury a single chitted seed potato, about 5” down, with chitting sprouts facing upward
- Cover the potato with compost and soil
- Place the seeded bag in a sunny, but frost free zone
- Water the bag regularly (whenever the compost has signs of drying out)
- Feed the plant with fertilizer about every other week.
The table that was shared above is a guide for when to expect a harvest.

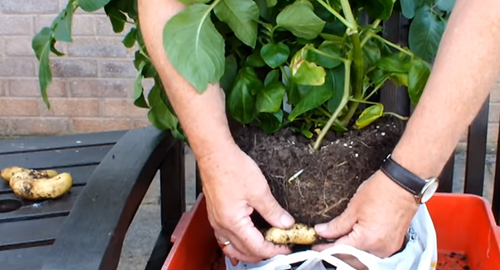
How to Store Potatoes
After harvesting your potatoes, let them dry out in a well ventilated place, for at least a few hours, until the skin is dry. You can store them in potato sacks or paper, in a cool, dark place, until you feel they’ve dried out enough.
So that’s a very easy operation, as you can see. But, it’s a process that will allow you even in tight spaces to have an extended harvest.


 in Cereal?")

