

The world is already struggling with food supply and crop management. The Intergovernmental Panel on Climate Change (IPCC) foresaw a general global climate warming over the next few decades. Growing our own food gives us control and independence over our lives.
The best seeds to store are those that are ideally suited to the specific climate in which you find yourself in. And of course, climates around the USA differ widely, from wet and warm, to cold and very dry. For your particular area, you should be doing some research and working out what fits your local weather systems. One of the best ways to do this is to observe and utilize what grows best around you.
The article will give you some general advice on the kinds of seeds you can think about storing, these are generalist plants but will establish a framework from which to work.
Seeds have to come from a good stock which originates. One of the modern day issues that we have to deal with is finding seeds that don’t come from GMO crops. Monsanto supporters of GMOs have actively acquired a large proportion of seed companies around the world. Additionally, Monsanto is partnering with several other companies to create the ‘doomsday seed bank’ known as the Svalbard Global Seed Vault with the express task of preserving ‘crop diversity’ anticipating world events would conspire to affect crop production. With that in mind, you need to find the right seeds to build your own seed bank on the doomsday.
Heirloom seeds come from original cultivar plants and are often resistant to disease through hybridization with other plant species. They are hardy and contain no changed genes-just a warning. Also, Monsanto buys up several heirloom seed companies, so you have to either build your own, or find Monsanto free seed companies. Seeds Now is a company which can supply heirloom seeds and does not deal with GMO-supporting firms. There are several others, check their section ‘about us’ which usually details whether they are GMO-free.
1. Squash Seeds
Depending on your climate, squash is very easy to grow and it gives you a good grub. Squash contains plenty of carbohydrates and a full range of nutrients, including vitamins A and C, as well as magnesium and potassium. They can also be used for cooking both sweet and savory dishes.
Other warmer climates will have good luck with other squash varieties such as Pumpkin. Pumpkin and butternut squash both love the sun; but they also are thirsty plants and need decent amounts of water.
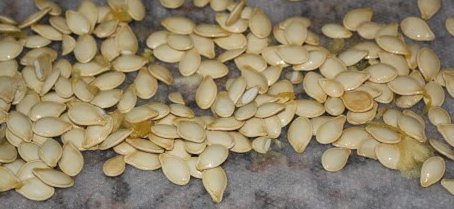
If you use your own seeds directly from a pumpkin, they will need to be dried out. To obtain storable seeds, obey these instructions:
- Open the pumpkin (or other squash) and pull out the seed mass along with some pulp.
- Put the mass into a colander or sieve and run water over, pulling the pulp away from the seeds.
- Continue to run cold water over the seeds until you have pulp free seeds.
- Place the seeds onto an absorbent paper or cloth towel – spread them out, so they aren’t touching.
- Dry them out in a cool dry place for about 1 week.
- The biggest seeds are the ones most likely to germinate.
- Store them in a cool, dark place, ideally keeping them in a paper envelope.
2. Green Beans

Green beans contain high levels of vitamin A and antioxidants, and they are very healthy for general health. You do have vitamin C, B12, and B6. Green beans are really easy to grow and crop well. They need cane support, as they grow tall (even the varieties of dwarf require some support).
If you wish to store your own green bean seeds grown at home, you should follow these instructions:
- Once you stop watering your green beans (around September) the pods will continue to grow. The larger pods are the ones you’re after for future seeds.
- Once the leaves of the plant start to die off, remove the larger pods for seed production.
- Gently open the pod down the edge.
- Very carefully (without damaging the delicate skin) remove the seeds.
- Place the seeds on a paper lined tray, spreading them out, so they don’t touch.
- Leave to dry in a cool, dry place for 1-2 weeks.
- Store in a jar in a cool, dark place.
Related: How To Make Survival Ration Bars At Home
3. Spinach
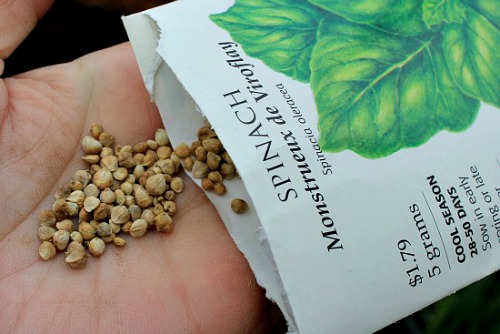
Spinach is a very versatile food which is easy to consume. You can eat it raw; or cook with it to bulk up salads; It has loads of vitamins A and C, as well as iron and minerals like potassium and magnesium. It’s best grown in spring and fall (some types are annual rather than biennial), and with spinach I’ve had a lot of success, I can’t seem to stop it growing. Spinach seeds are a bit harder to get at and keep than the two previous types of seeds that we have mentioned. To obtain the seed you need to let some of your spinach grow on to flower. At this point, it will not be edible (it will taste quite bitter), so it is really only good for collecting seeds. Collect spinach seeds and store them, follow these steps:
NOTE: Baby spinach is the best type of spinach for seed collection
- Let your spinach continue to grow until it flowers.
- You will get two types of plant, a male ad a female. They can be differentiated by the color of the little balls that grow under the leaves. The female has only green balls, whereas the male has yellow ones.
- Usually the spinach wind pollinates between the male and female plants, but to give nature a helping hand you can give the male plants a ‘flick’ to get them to release their pollen.
- Once the plants start to turn yellow they are ready (the color shows they have given up all of their nutrients into the seed stage).
- Pull them up and discard the male plants.
- Hang the female plants upside down in a cool; dry place.
- Leave for about 2 weeks until the whole plant dries up. The seeds will now be dry too and usually they can be simply shaken onto paper to collect (they are very small).
- Keep them in a jar in a cool; dry place – they usually only store till the next season.
4. Potato
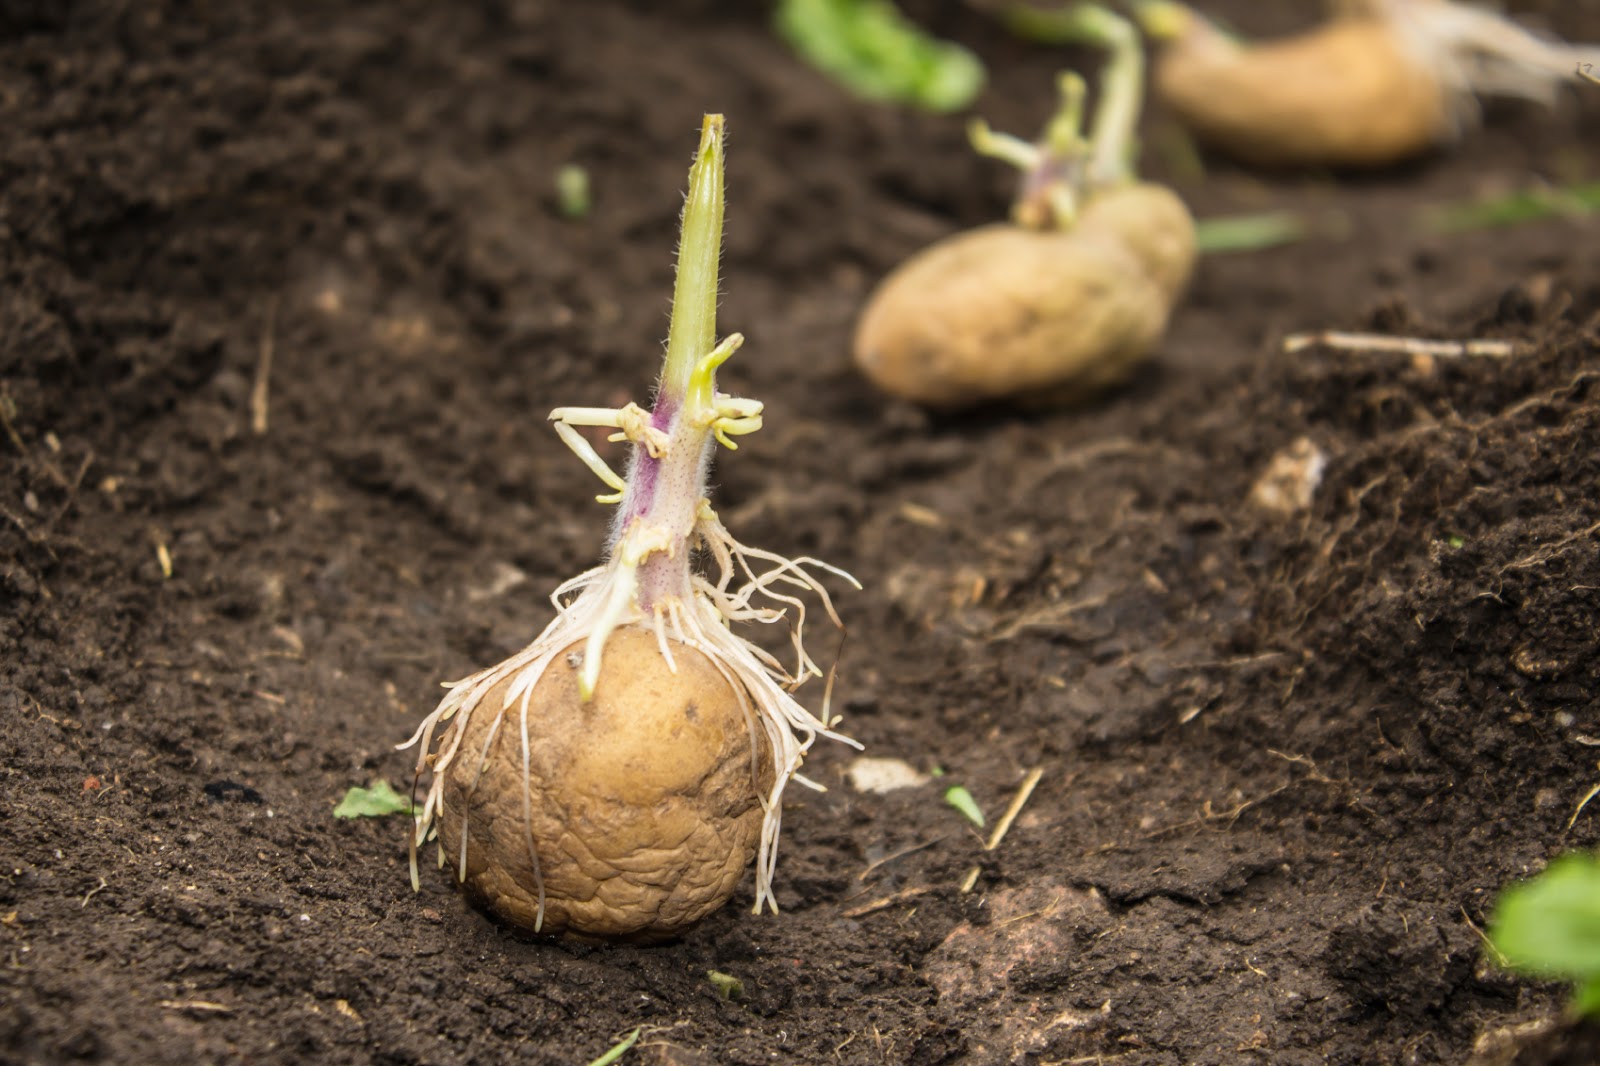
Potatoes are a staple diet of many people around the world, particularly those in the west. The contain potassium, copper, and B6 and are perfect to ‘fill you up’ at mealtime. They are generally very easy to grow too, though some varieties are quite susceptible to disease. I lost whole crops to blight during wet years while growing, when that happens, it’s really disheartening. So avoid it, select your variety of starters with strong resistance to disease. They can be found in any good shop. I’ve used the ‘Charlotte’ variety that I’ve never lost to blight yet, and they taste wonderful. Other varieties which are immune to disease include the Caribbean, Purple Peruvian and Prince Hairy (very strong against potato beetle).
To produce potatoes direct from the seed:
From the seed you can grow potatoes. The seeds can be found in small amounts, round pods once the potatoes start to die off. However, not all potatoes grow these pods, especially potatoes created for the mass market because their pollen is not fertile anymore. But if you find the little green balls on your plant, you can try growing potatoes using the seeds inside. However-warning. Growing edible tubers directly from seed takes at least two seasons. You end up with ‘tuberlets’ the first year that become your ‘seed potatoes’ which ultimately become your first true crop.
To extract the seeds out of the balls:
- Harvest the balls when feel soft and ripe.
- It’s hard to get the tightly packed seeds out of the pod; so you can cover the pods with water and smash them up using a rolling pin or similar.
- Leave this smash in the water overnight.
- The seeds should start to pull away from the pod and sink to the bottom of the container.
- The seeds are very small, like tomato seeds.
- Rinse the seeds and place on an absorbent cloth or towel to dry out.
- Store in a cool, dry place.
Using seed potatoes
Not to confuse ‘potato seed’ with’seed potato.’ If you have a previous year’s crop, keep those potatoes that begin to sprout, as they become your seed potatoes.
To prepare seed potatoes for planting, I usually have a supply of egg boxes or similar, that I use to ‘chit’ the potatoes out in. Egg boxes are good, because they keep the potatoes apart from each other naturally. Place each seed potato, sprout end up in the box and leave for about 6 weeks until you have about 1 inch of sprout in a light place away from frost. Then, they are able to plant.
Related: 6 Pioneer Recipes Every Prepper Should Learn
5. Corn

If you live in a sunny place, corn is a really good crop to grow. It has iron, vitamin B6, and is a great carbohydrate source. You can use it to make other foods of all kinds, like corn bread. Corn is pollinated by the wind, so you need two crops, a mile apart is good, but then it can get closer and pollinate. If you are interested in harvesting your own corn seed from your crop, follow these instructions:
IMPORTANT: Corn may suffer from excessive inbreeding. You just need to reduce this by providing a strong plant supply from which to take seeds, it is recommended that over 100 plants have a fairly large gene pool.
Corn HAS to be pollinated to form a kernel for the seed and germinate into a new plant. Growing corn in blocks helps pollination rather than long rows.
- Leave the plants for up to 6 weeks after normal harvesting of the ears.
- The ears should be allowed to mature and dry on the stalk (try to avoid the ears getting wet in rain during this stage). When they are dry, the kernels will feel hard and can’t be dented by a thumbnail.
- Once dried, rub kernels off the ears off with your hands.
- Lay the kernels onto paper and allow to dry for a further 1-2 weeks.
- Pull any bits of silk or debris from the kernels.
- Store in a cool, dry place


 in Cereal?")

