

Fresh, unfiltered, and raw (unpasteurized) apple cider vinegar are the best.
I use scraps (peels and cores), actually. I get to eat my apples this way and also make vinegar. Or if you’re making a pie or apple sauce … you should start making the vinegar first, instead of throwing away the scraps.
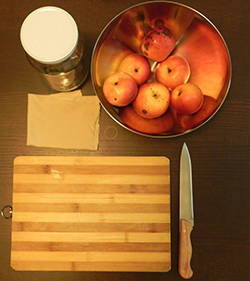
You’ll need:
- apple peels, cores and any browning/discolored flesh from pesticide-free apples (I used only 3 of them)
- one large jar (for fermentation) and another one to let the vinegar rest
- a rubber band
- Cheesecloth or floursack cloth
- Honey or granulated sugar
- Water
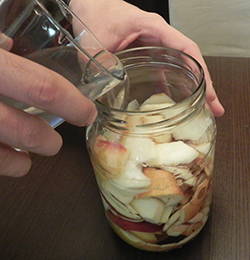
Peel the apples and fill your jar with your apple scraps (peels & cores), seeds, stems and all by at least half way. When at least half of the container is not filled, add additional apple scraps until you reach a minimum of this amount.
Make sure that the bits are big enough to strain out later quickly (no puree).
Pour in room temperature (filtered) water until the chopped apples are completely coated, leaving the jar just around 1-2 inches to the rim.
Stir the raw honey or cane sugar until it has fully dissolved.
Optional: you can add yeast to accelerate the fermentation cycle (Specially grown yeasts are available in wine-making stores for this purpose).
Tip: To start this fermentation, you may use raw apple cider vinegar, using 2 table spoons per fifth.
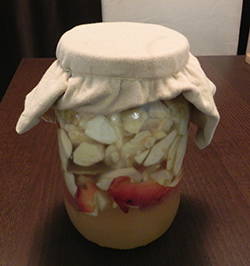
Cover the top of the glass jar with cheesecloth, a thin white dishtowel or floursack cloth and secure with a large rubber band.
Stir up the mixtures every day. Keep the containers away from direct sunlight and maintain 60 to 80 degrees F.
For the method, the healthy bacteria that make vinegar need oxygen, so it is necessary to not seal the jar with a lid until the vinegar is as powerful as you want it to be.
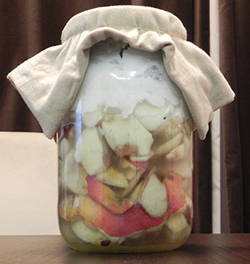
Leave in for around 1 week on the counter.
When the sugar ferments into alcohol, bubbles begin to form.
As you can see it did some bubbles – a positive sign that bacteria had eaten the sugars in this cycle and created carbon dioxide (aka fermentation)
The hard apple cider is ready when the apple scraps no longer float and fall to the bottom of the jar (see picture) after about one week (but could take 2).
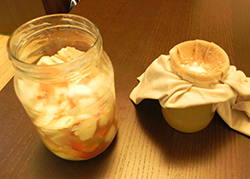
Strain the apple scraps and dump in another glass container of strong apple cider.
Cover with a piece of fresh cheesecloth and cover with a rubber tape. Leave on the counter in an out-of-the-way spot for an additional 3-4 weeks to allow the alcohol to turn into acetic acid by the action of acetic acid bacteria.
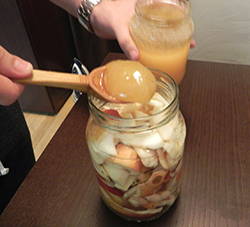
Flouting in your vinegar you’ll find “Mother of vinegar”-a material composed of a mixture of cellulose and acetic acid bacteria that grows on fermenting alcoholic beverages, which converts alcohol into acetic acid. It’s normal!

Gently dipping a spoon somewhere around the edge of the “mother” where it touches the container, collect just enough of the vinegar for a taste. If you like your ferment very acidic or pleasant and you are ready to bottle your vinegar
Filter the liquid through several layers of fine cheesecloth or filter paper — a coffee filter works well for this. It removes the mother of vinegar, thereby avoiding further fermentation or product spoilage.
If the vinegar is extremely acidic and you find it practically too potent, you can simply add some spring or filtered water to mellow the acid.
Raw apple cider vinegar isn’t going bad, but if you leave it for a long time, it’s possible that another mother culture will grow on top. This is good, just strain it again and dilute it with a bit of water if the taste is too bad. You have to pasteurize the raw vinegar if you want to keep this from happening.
Related: 16 Free Alternative Pain Meds
Pasteurizing the Vinegar (optional)
Pasteurizing destroys the living bacteria in the vinegar which stops further growth, stabilizes the flavor and extends the shelf life
Pour the vinegar into a large stainless steel or enamel-coated bowl, to pasteurize the vinegar.
Bring the vinegar up to 140 degrees over medium heat, and hold it for 10 minutes at this temperature. Be careful not to boil your vinegar. Turn the heat down, and allow the uncovered vinegar to cool. Upon cooling, pour the vinegar into your storage container and seal until it is ready for use.
Caution
When making vinegar at home two factors need special attention: oxygen supply and temperature. Oxygen is dispersed in the mixture by mixing it regularly and allowing air through a cheesecloth filter to enter the product, which is used instead of a normal cap. The fermenting cider temperature should be kept at 60 to 80 degrees Fahrenheit (F). Lower temperatures don’t always create a usable vinegar, and higher temperatures interfere with the “mother of vinegar” formation.
Do not use a metal jar when making vinegar; metal or aluminum items can corrode with acid in the mix. Containers made of glass, plastic , wood, enamel, or stainless steel should be used for vinegar making or storage.


 in Cereal?")

