

I wrote this free, thorough, step-by-step picture guide just to show you how unbelievably simple it is to make your own washing machine off the grid.
Some of the supplies you’ll need can be found around your home and at your local hardware store, for sure.
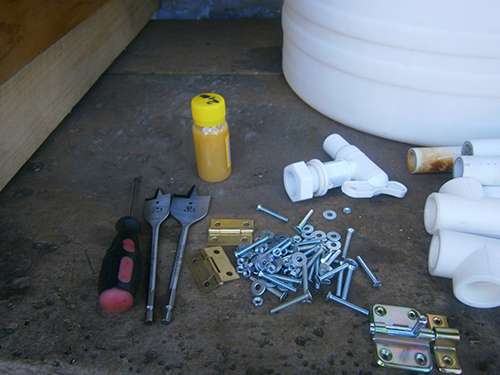
Let’s see what essential things you’ll need:
- A bottle of rubber glue.
- Flat wood drill bits, one 25 and the other 35
- One door latch
- Two hinges
- Around 25 screws with nuts and washers
- Around 6.6 inches of PVC piping
- A barrel
- One inner and outer bicycle tire
- Two PVC T-shaped pieces
- A PVC tap (optional)
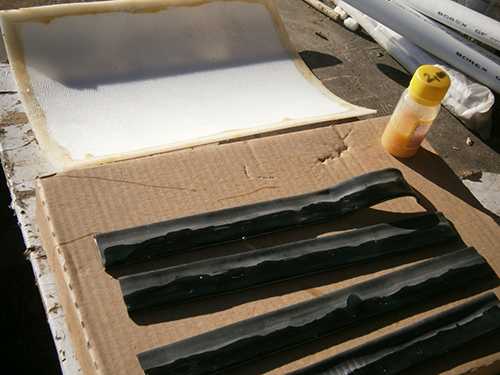
- Six 37 3/8 x3x3-inch (approx. 95x8x8-cm) rectangular logs

Now that you have everything ready, let’s get started!
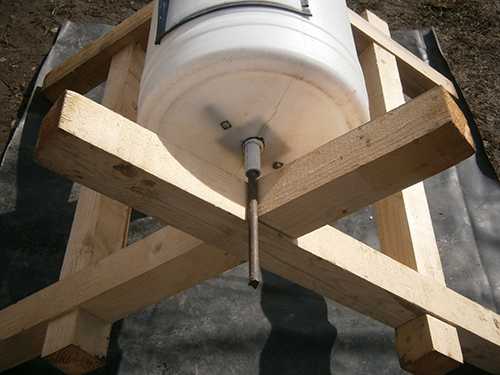
Step One: Building the Stand for the Washing Machine
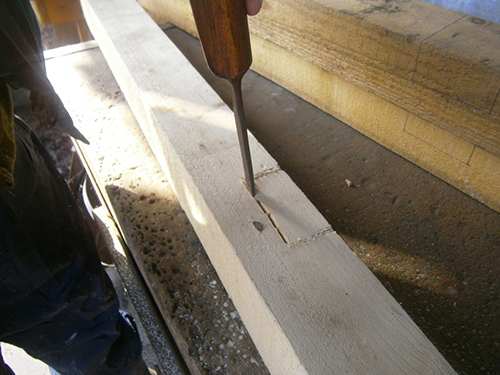
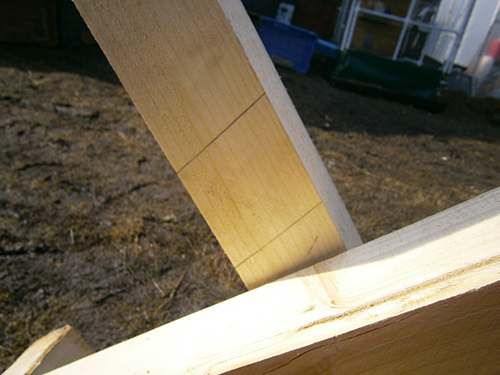
First, you need to take the wood and measure out 9 7/8 inches (approx. 25 cm) from the base of the wood and then mark it.
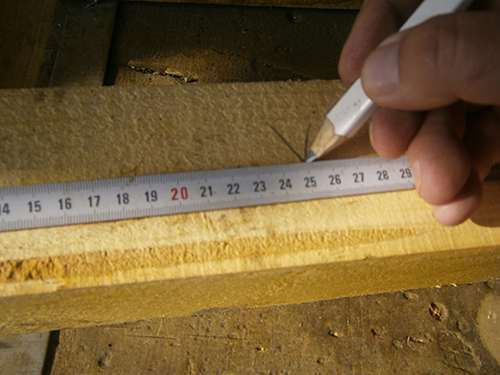
You would have to draw a horizontal line from that mark to reach the other half of the piece of wood or to meet the halfway point and draw another mark 3 1/8 inches (approx. 8 cm) to the right of the previous mark and then draw a line on that mark too. Connect two lines together to form a rectangle.
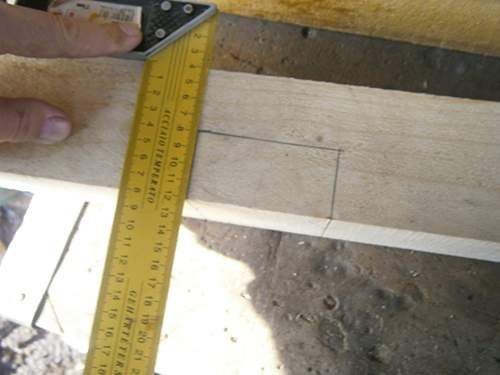
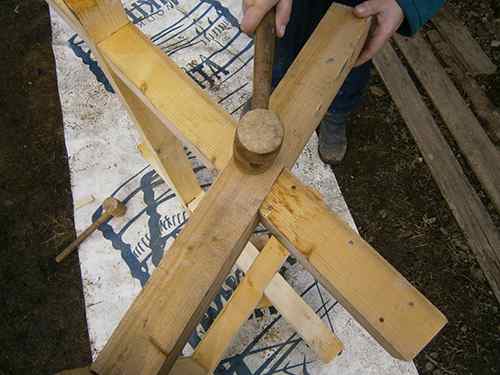
Do the same now on the lumber’s bottom side, then attach them to get a brick-like form. You can begin to cut it out. I would recommend using a jigsaw, it makes the whole process quicker and you’ll get a cleaner cut.
By using a chisel and a wooden hammer, you can easily remove the pieces.
It should look something like this.
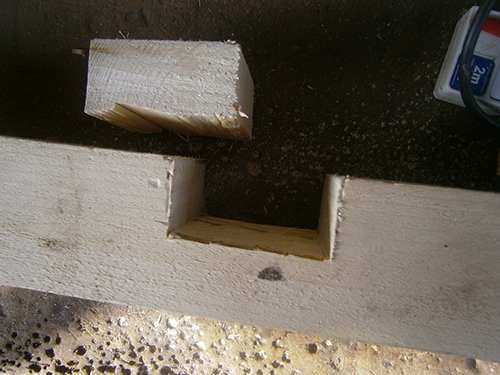
Now that we’ve done that, do the same with the rest of the lumber, and put them together.
If you end up cutting the wrong size, don’t worry. You can always fill the gaps and fix them with a hammer to create enough support.
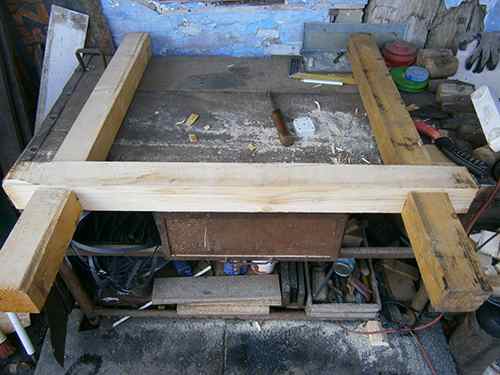
Put the two U-shaped structures in such a way that they form a V. You might need an extra hand for this part.
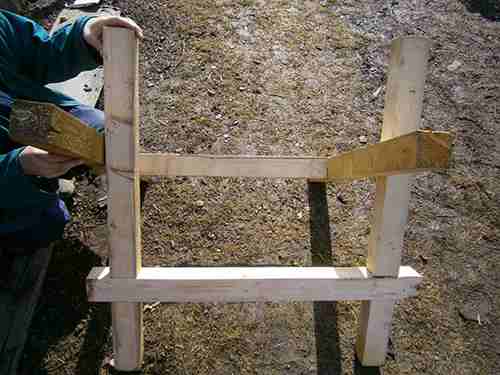
Now that you’ve set it up in a tight position at your desired height, you have to mark the places where the boards join on both structures so that you’ll know where to cut the wood.
Now simply cut away the wood using the same technique, and hammer the two pieces together until they support each other. If you do it right, you won’t need any nails.
Related: This Recipe Heals Your Knees And Reconstructs Bones And Joints Immediately!
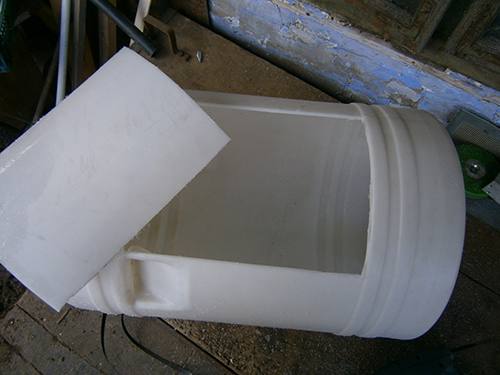
Step Two: Cutting the Hatch out and Helping the Rotation of Clothes
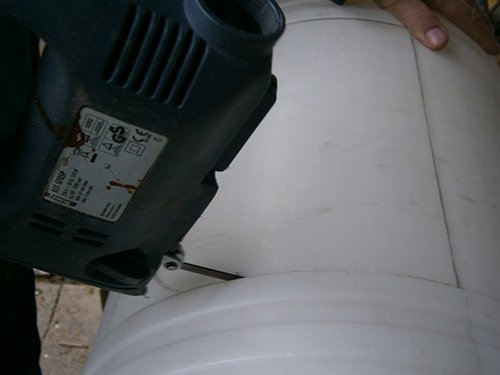
First, measure out a 1-inch by 1-inch area on the side of the barrel, and start cutting it out.
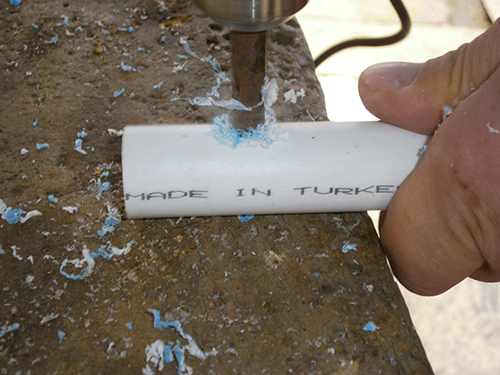
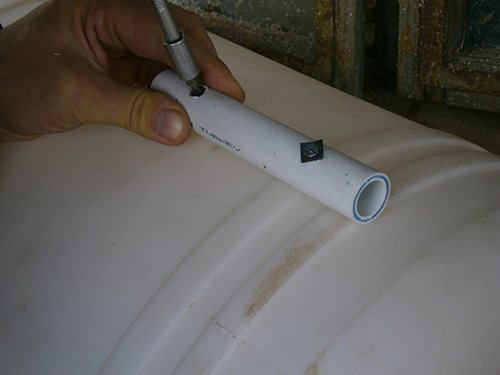
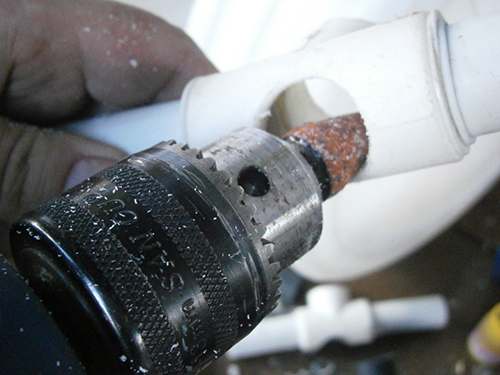
 Next, pick up your PVC pipes and cut off at least two 6 6/8-inch-long (approx. 17 cm) pieces. Drill one-one holes at the ends of the pipe, and drill through it with a 4 mm drill bit.
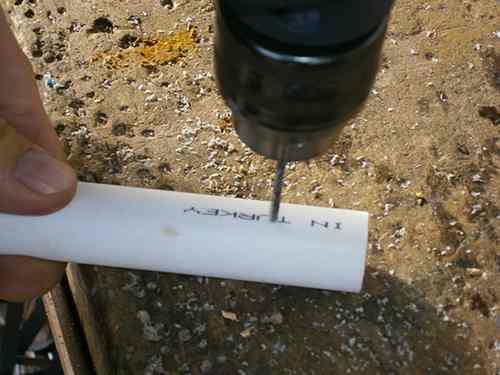
After that, using a 10 mm drill bit, drill through the holes again, but don’t go all the way through both sides. We only want to have one side of the pipe this size.
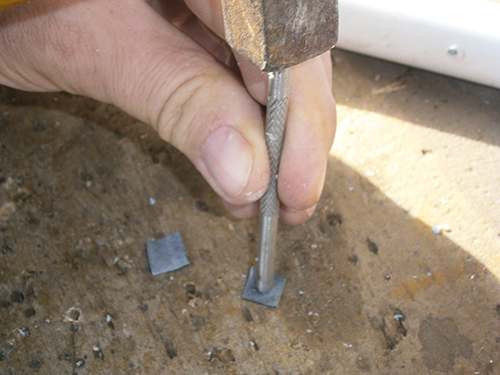
Put the pipes away, and cut into tiny cubes some parts of the bike’s inner tire that are only bigger than the heads of the screw. Using a poker hole in cloth, then cut a hole that matches the screw. Make 2 pieces of rubber for each pipe.
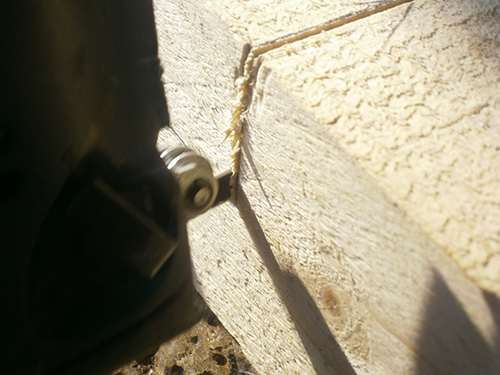
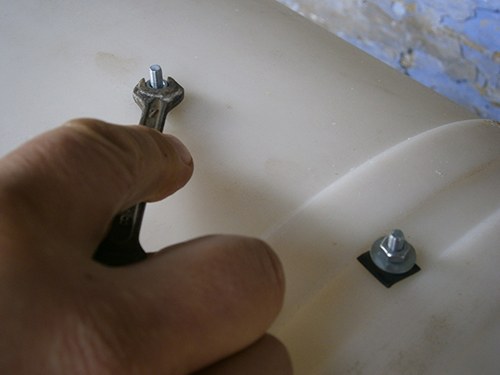
After that, grab the same number of screws, washers, and nuts as the number of pipes you have.

Now put the pipe against the barrel where you want the pipe to be, and drill the 4 mm drill bit through it so that it punctures the tube. I would recommend first bringing the pipe outside, this way you’ll have an easier time drilling through it. Place the square of rubber through the tube, then put the tube through the pipe and drill it in. Reach through the barrel, and force through the exposed end of the screw the second rubber block. Place the washer on, and use a nut to protect it.
Now that the holes are about the size that we need them to be, do the same in reverse so the pipe is inside the barrel. Repeat as many times as you wish to this method. I put up three good-rotation pipes. I cut the ends of the screws with a metal cutting saw, too, so that they will not stick out.
Step Three: Securing the Barrel onto the Wooden Structure
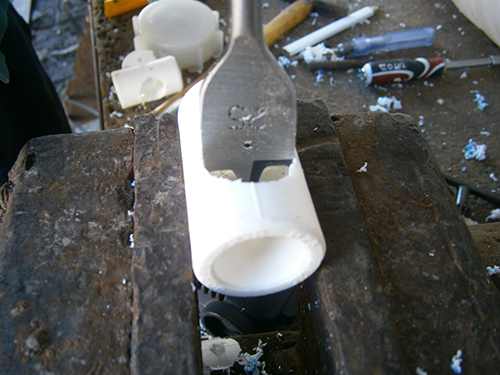
Grab the T-shaped PVC connectors, and drill a hole at the top-middle part of the T with your size 25 flat wood drill bit.
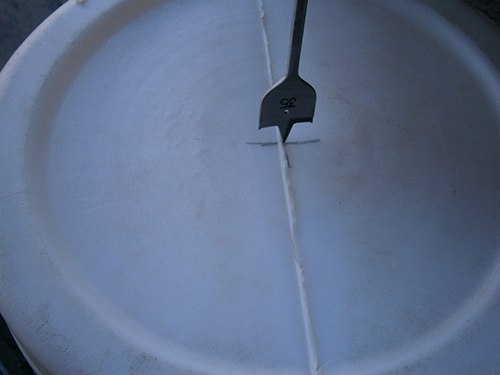
If the cap is not in the middle of the barrel, drill through it with the size 35 wood drill bit. Do the same for the bottom of the barrel with the same-sized bit.
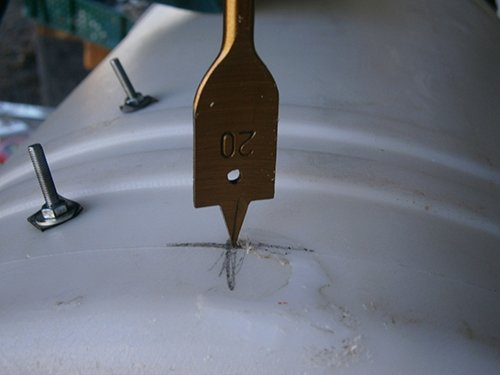
Optional: Make a hole at the side of the barrel for the tap, and drill it out with the size that fits your tap, for mine, it was size 20. Put on the plastic nut that comes with it, and close the tap for now.
Related: How to Make Your Own Turmeric Drops
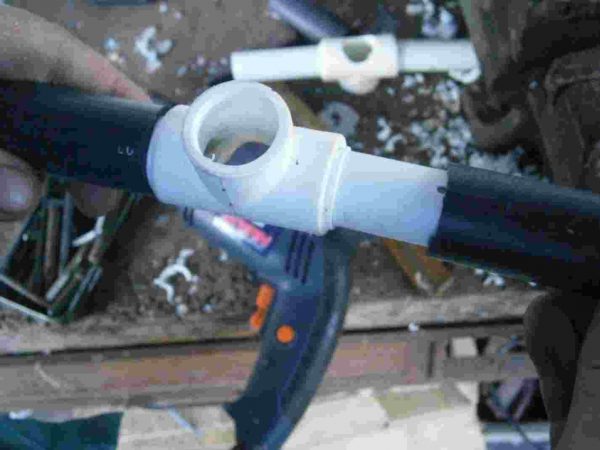
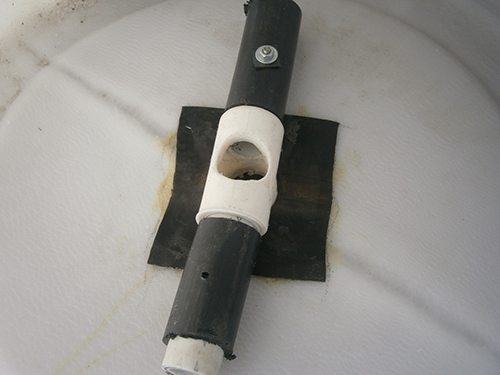
I attached the T pipe connectors with two pieces of pipe for extra help distributing the weight when we put in the water and the clothes. Simply turn the PVC pipe welder on, and push the PVC pipes onto it.
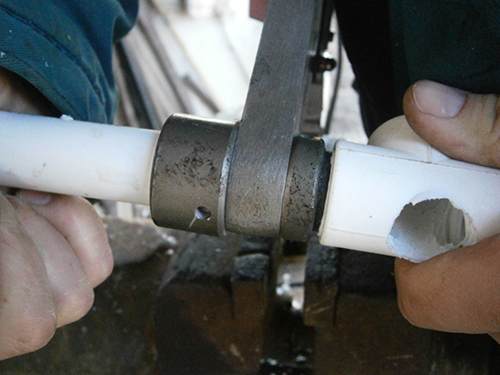
I used a sander bit to make the hole a little bigger and to smooth out the hole I made on the T connector.
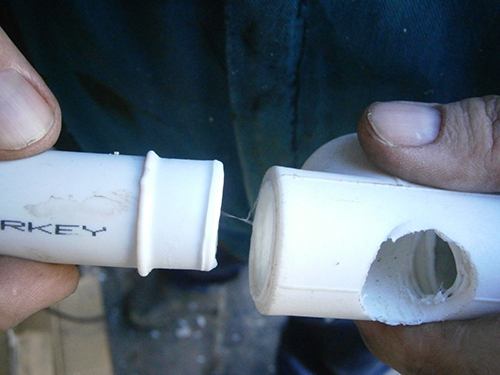
I placed another pipe onto my PVC so that there wouldn’t be any space between the barrel and the T connector.
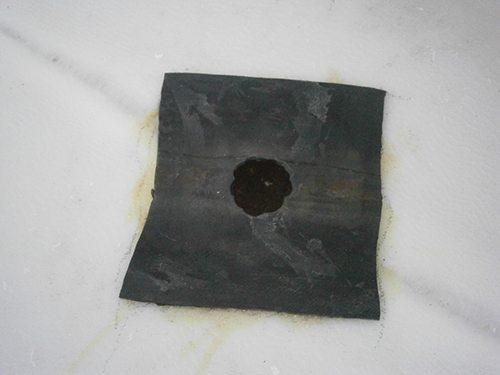
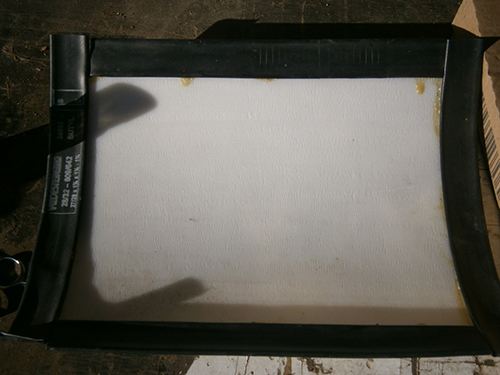
Now cut two pieces of rubber that could fit into the holes you finished on the bottom and top of the barrel. Using the rubber glue on the rubber, and cover the place. The directions on the glue that I said to leave on until it dried, and then connect it to each other. I recommend that you follow the bottle directions because they may differ depending on the glue.
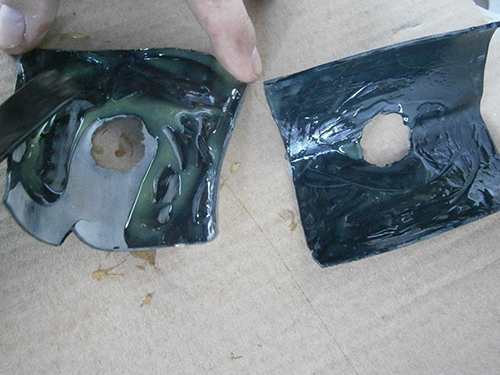
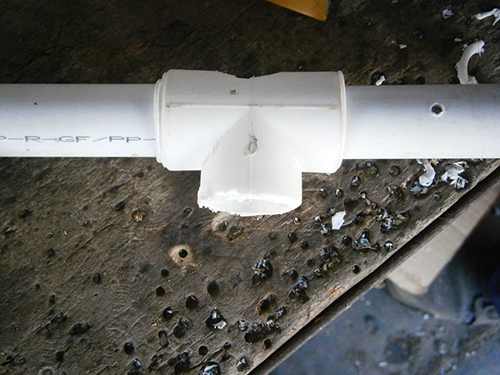
Put the two pieces together, and let them dry until they are completely affixed.
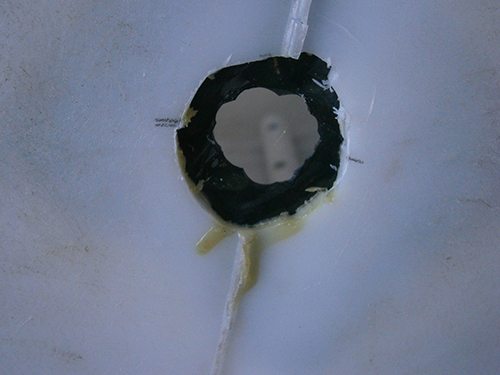
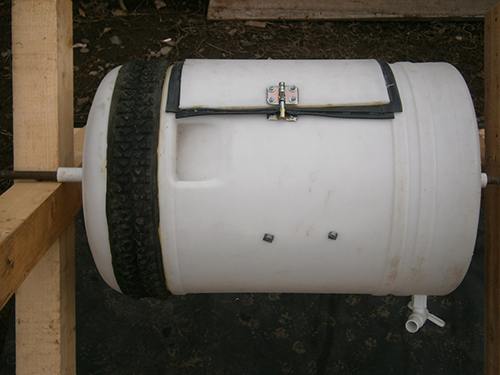
This is how it looks from the outside.
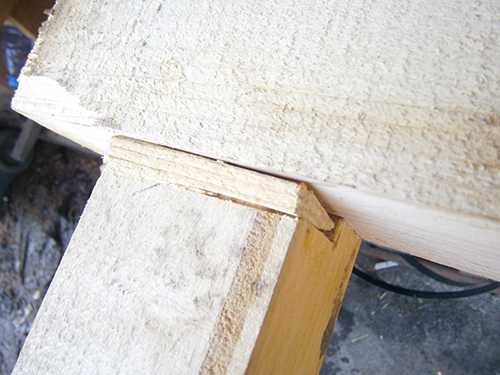
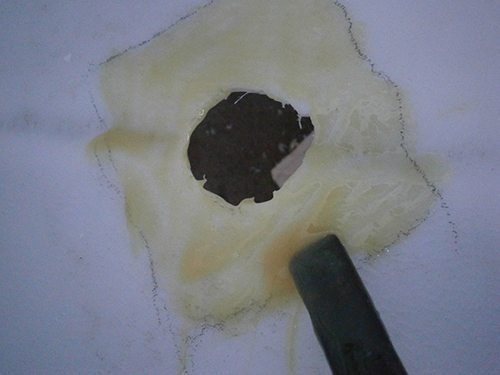
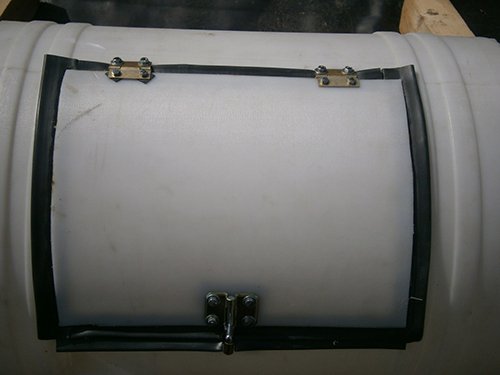
Now take the hatch that you cut off from the tank, and measure bits from the inner tire of the wheel. Apply glue to the sides of the hatch and to one side of the cutout tire bits so that when it is placed up, the hatch overhangs.
While you wait, push the T connector through the barrels’ holes, and secure it to the pipes you welded to it. Use the same method with the screws to secure it.
After the glue is applied, put the pieces together, and wait for it to dry.
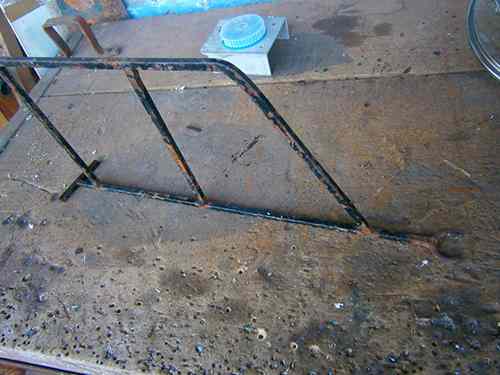
I pushed a metal bar through the holes and placed a PVC pipe through the T connectors so the metal won’t rust from the water.

After that, attach the hatch with the latch and hinges, and use a bit of rubber to place it on—the same idea as with the screws.
After that, place the barrel onto the wooden structure and secure it with fencing staples.
Step Four: Making It Spin
Grab the bike tire’s outer layer, and cut out the metal rods as you will not need those parts.
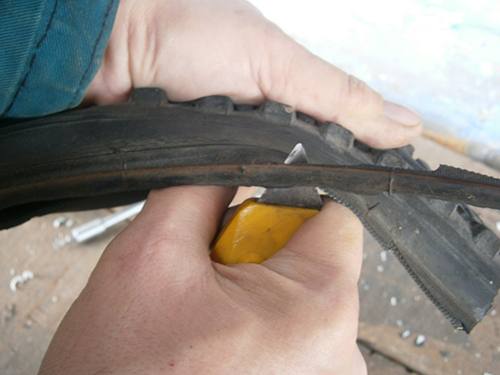
Using the rest of the glue, apply it to the tire’s outer layer and the barrel. Let the two dry, and then glue them together.
It should look something like this.
Related: 18 Vintage Homesteading Tools to Search for at Garage Sales
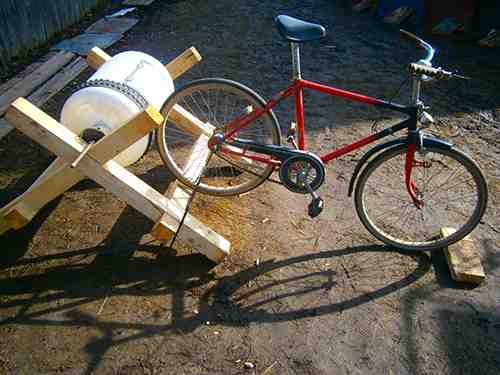
Step Five: Connecting the Bike and the Washing Machine
I found part of an old shelf and thought I would use it up. At this point, you have to be creative and find a way to attach the bike. You could make a wooden support or use some scrap metal. Anything works as long as it can hold the bike up.
Using fencing staples, I attached it to the side of my support. Conveniently, it had a hole on top where the bike would fit perfectly.
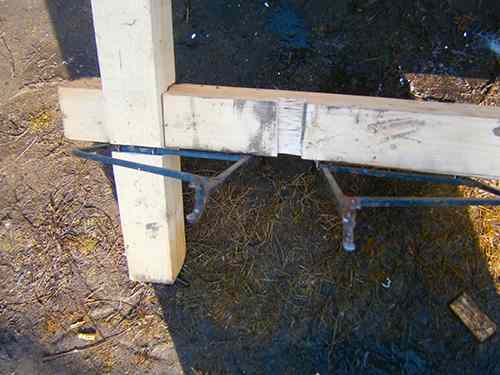
This is how I used the fencing staples.

This is how it ended up looking.
Step Six: Trying It Out
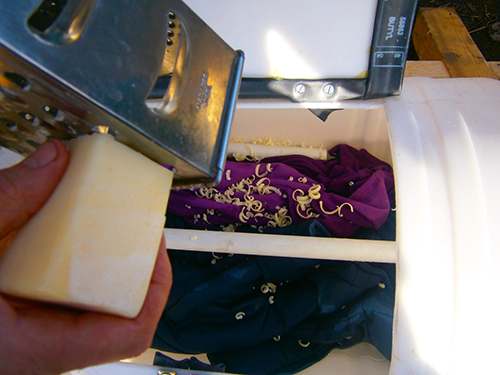
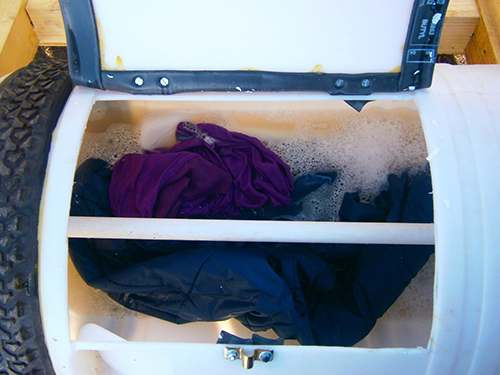
First, I got the water, soap, and clothes ready. I filled it halfway with water then put the clothes in. With a grater, I grated some soap into it.
After 10 minutes of work, the clothes ended up pretty clean. They did need to be rinsed, but that is the smallest of my troubles if I can clean my clothes without electricity.
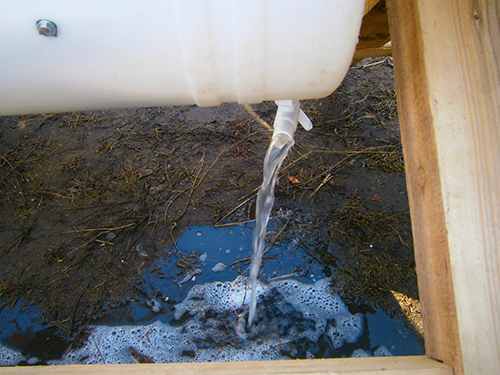
And of course, I had to try out the tap to see if it worked as I wanted it to.
And that’s it — you just made yourself a man-powered washing machine, if you have a big family, will save you enormous quantities of energy. The best thing is that this can be a perfect way to get into a fitness workout, if you want to work out. Even if it can wear you out pretty fast, it’s worth it for all the money you’ll save.


 in Cereal?")

