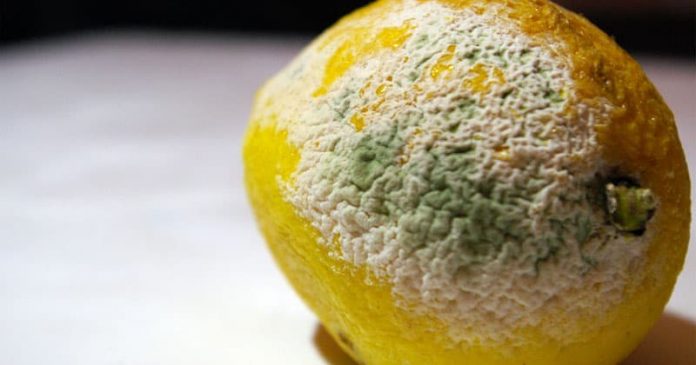
One of the threats most of us face would be an almost complete lack of treatment after the collapse. All of us are going to sicken and die over stuff that weren’t even considered important before SHTF. After reading this article you are learning how to produce Penicillin at home. You may either start making your own penicillin, or simply use the knowledge in SHTF or TEOTWAWKI situations.
Just to give you an idea of how precious it would be to know how to produce penicillin, think of this: during the early penicillin period, the drug was so scarce and highly desired that it became popular to collect the urine from patients being treated, so that the penicillin in the urine could be separated and reused for other patients.
About Penicillin
Penicillin is an antibiotic which fights bacteria, fungi or microbes in our body. Penicillin was the first antibiotic discovered (1933) – the word means against (anti) life (bio).
Penicillin: C16H18N2O5S
The most important medical breakthrough of the 20th century was arguably the breakthrough of penicillin and its therapeutic applications. Penicillin processing is a process that has drastically improved since its inceptions.
Penicillin is not only used to cure colds, but also to cure severe diseases such as Typhoid Fever, Syphilis, Pneumonia, Meningitis, Anthrax, Tetanus Tuberculosis, Chlamydia, Abscesses, Leptospirosis, Lyme disease.
Perhaps most essential of all, it treats infections. Simple cuts will start showing infection very quickly when SHTF is involved. And without an antibiotic, you may develop septicemia (infection of the blood) or gangrene that is deadly without very strong antibiotics or surgery. Many people had died without antibiotics because of simple wounds like kings including Louis XIV, Napoleon III or Gustav III of Sweden.
Related: How To Use Milk Thistle For Inflammation
How to Make Penicillin at Home?
1. Make Penicillin Fungus
To produce penicillin at home, the Penicillin fungus needs to develop first. The most important thing to remember is always using sterile procedures or you’ll probably end up with something else growing up.
Expose a slice of bread to the air at 70° F, in a dark place and with normal-high humidity. Before the mold becomes bluish-green. This phase will last a period of 7-14 days.
The mold will start grey, but will turn bright blue-green as it grows. Break the bread into pieces once it gets started, and put it in a sterilized jar. Incubate it in the flask under the same conditions for about a week.
Even you can make penicillin out of the peel of citrus fruits, cantaloupe or salami the same way.
2. Prepare the Solution to Separate the Penicillin Substance from the Fungus
Dissolve the following ingredients, in the order listed, into 500ml of cold tap water:
- Lactose Monohydrate – 44.0 grams
- Cornstarch – 25.0 grams
- Sodium Nitrate – 3.0 grams
- Magnesium Sulfate – 0.25 grams
- Potassium Phosphate Mono – 0.50 grams
- Glucose Monohydrate – 2.75 grams
- Zinc Sulfate – 0.044 grams
- Manganese Sulfate – 0.044 grams
Then add enough cold tap water to make one liter. Use Hydrochloric Acid to adjust the pH between 5.0 and 5.5.
3. Separate the Penicillin substance
Pour over the solution into bottles of sterilized milk. Use only enough so that the media will not hit the plug when the bottle is put in its hand. Apply in one tablespoon of the spores you grew up with.
Incubate the flasks for 7 days at 70° F. If penicillin was developed in the culture, you can now see it in the liquid portion of the solution after this incubation time. Filter the medium (using a coffee filter or a thick canvas), cover the bottles and immediately refrigerate. So you’re making penicillin.
Use the hydrochloric acid again after a few hours to change the solution to 2.2 Ph. Mix it with cold Ethyl Acetate in a Separatory Funnel and shake well.
From the bottom drain the ethyl acetate into a beaker which has been put in an ice bath and repeat the procedure. Connect 1 percent acetate of potassium and blend. Wait now for the ethyl acetate to evaporate. That may take some time.
The leftover powder is containing penicillin until it eventually dries.
There are other means of penicillin production. In reality, pharmaceutical companies nowadays use other, more complex, methods to produce penicillin. Yet when it first began this was the only way to produce penicillin. See this short video:
Related: The Health Benefits of Prickly Ash
How to Test Homemade Penicillin Before Using It
While you may have made mold growing on the bread, you may have other molds as well. Even with the right sort of fungi growing, it is difficult to flush anything out but the penicillin.
To make sure you’ve made penicillin, and not a poisonous drug, you need to test it!
Antibiotic activity can be assessed in a rough manner by creating an agar mold in a petri dish with small depressions, injecting a drop of penicillin broth into each depression, inoculating the plate with an established, penicillin-susceptible bacteria, and measuring the area of inhibition from penicillin-laced depressions over many days compared to controls in which only water has been added.
If the outcome is good, I recommend testing it on an animal in small doses before taking it just to be absolutely certain it isn’t harmful. If you’ve got a sick animal then try it and see the outcome. Oh, it should get better really fast! If it’s a survival situation, the penicillin made from this experiment should not be used.


