
Making your own bicycle generator is a good addition for those who are interested in going off the grid and finding a way to live on their own terms. It not only generates electricity but also provides you with a great cardio workout, which could be an alternative to going for a run and a good addition to anyone’s life.
Building the generator is simple if you have the motivation, creativity and, of course, the items necessary to build it:

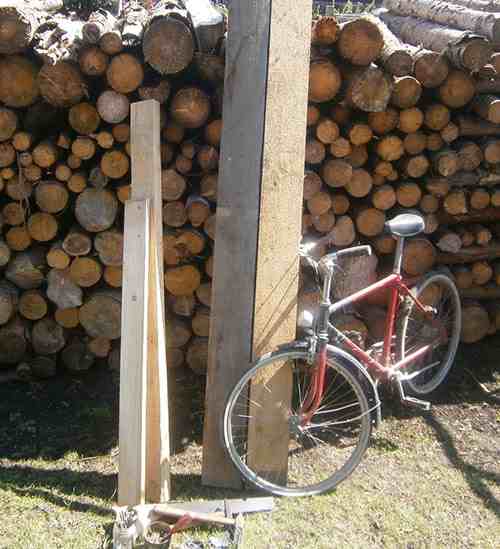
- Two 50-inch x 6-inch x 2-inch wooden planks
- One 24-inch plank (or a height that would be enough to lift up the back wheel of your bike when the plank is cut in two)
- A short plank that will connect the two 50-inch planks
- A saw
- Nails of different sizes
- A Phillips screwdriver
- Screws
- Hammers
- A nail puller
- Metal L corner braces in two different sizes
- A fan belt
- A car alternator
- A battery
- A voltage regulator
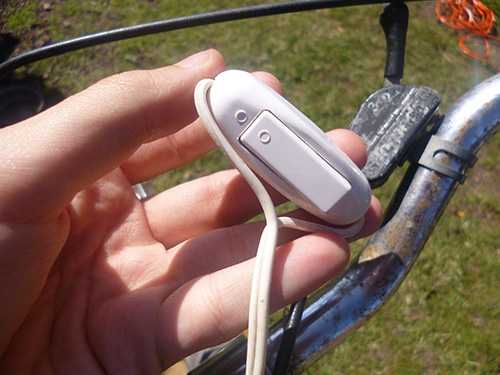
- A switch
- And, of course, the bike itself
Related: Tools You Will Need When SHTF
First, we need to set up the base of the generator. Start with the two 50-inch wooden planks and put them next to each other. Saw the 24-inch-long plank down the middle into two pieces. Nail these planks to the 50-inch-long wooden plank at the top and bottom, creating the base. Place the bike onto the base, and draw a line at the bike’s cassette sprocket onto the boards. Cut the 24-inch wooden plank into two, and cut a triangle onto one end of each. With screws and the corner braces, fix the planks vertically each side of where you marked the sprocket.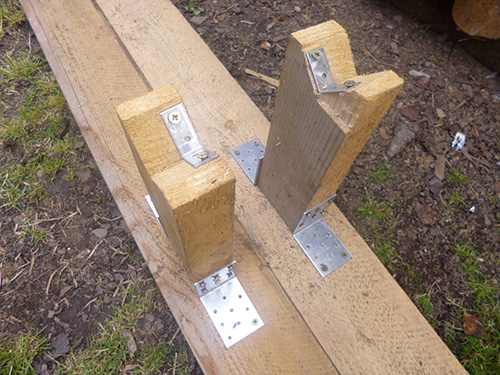
You should end up with something similar to mine.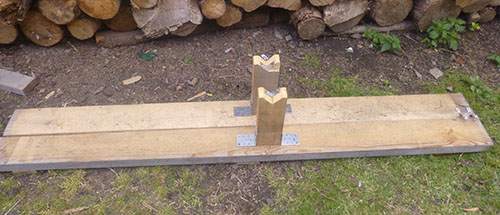
Put some sort of lock at the front of the base that will stop the front wheel from moving. I found some bendable metal braces that I used to secure the front wheel.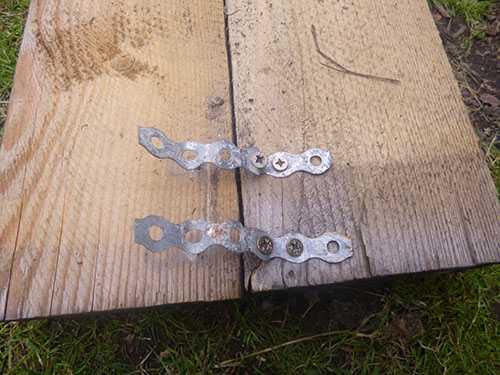
To try it out, I put the bike onto the base with the front wheel locked tightly in place.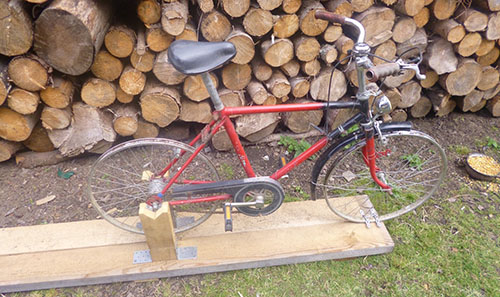
The front wheel was locked tightly. The back wheel was sitting firmly on the stand, slightly above the base, which made it able to spin. The next step was to take apart the hub of the back wheel to release it from the frame of the bike, put the fan belt onto the wheel then reattach the wheel to the bike frame. Find a way to attach the alternator to the wooden base. I found a piece of metal that I cut to size and drilled holes into. 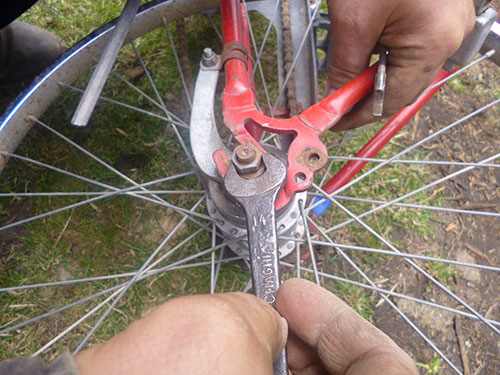
Put the fan belt onto the alternator, and see how far you can pull it out to make the belt tighter.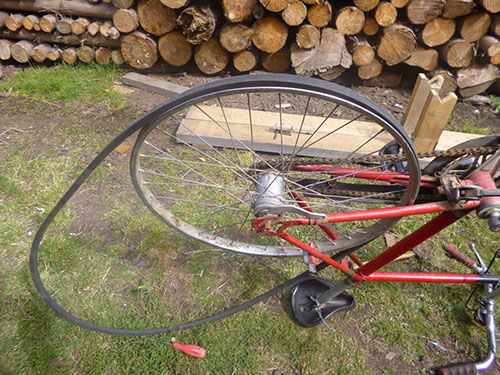
After finding the perfect spot, draw a line so you can see where to screw the piece of metal.
Next I attached the alternator to the piece of metal then attached the fan belt with the motor. 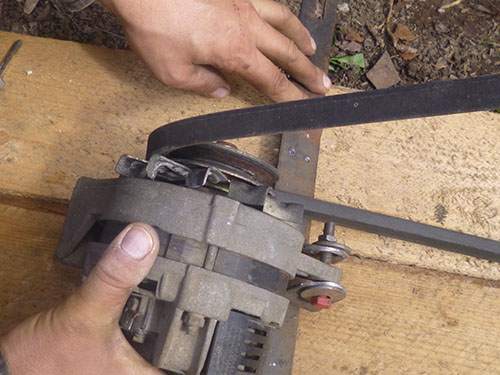
To make the belt tighter or looser, I attached a piece of metal that looked similar to a clamp and connected it to the motor with a bolt and a nut.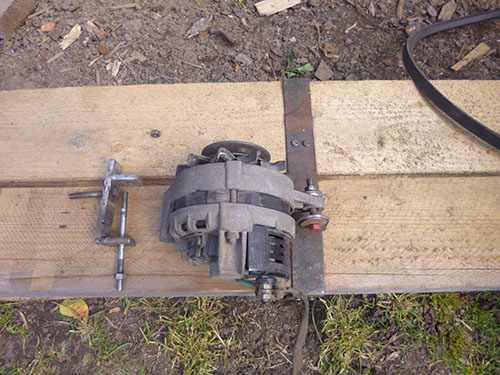
I drilled a hole into the ground to make a place for the other bolt. I also attached another piece of metal to the wood where I made the hole in order to make the bolt stronger. Now I was able to make it tighter or looser.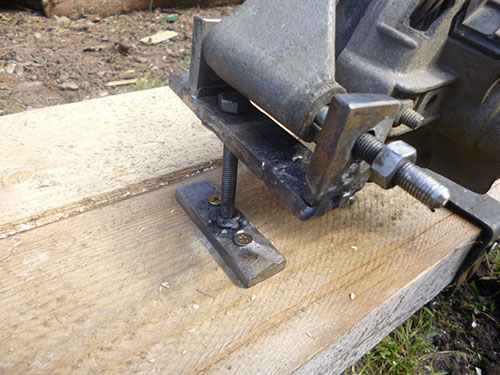
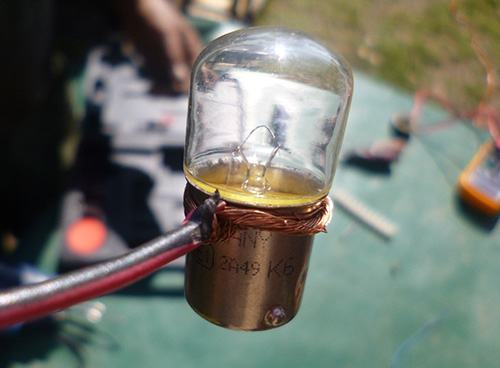
Because I want to show that this system really works, I prepared two light bulbs; one of them was a 12-volt, 8-watt bulb, while the other was a 110-volt 20-watt bulb. For this, I needed an inverter because of the higher voltage needed. To set it all up I got an inverter, the battery, a soldering iron and solder, and a multimeter.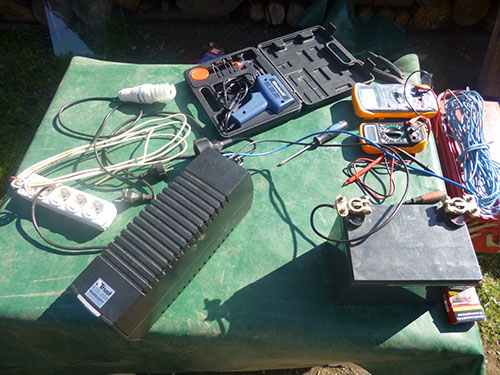
Install the voltage regulator to the alternator to add the switch. This way the alternator can be turned off and won’t steal the electricity inside the battery while it’s out of use. Attach the positive (red) wire to the motor.
- Connect the negative (blue) wire to the voltage regulator.
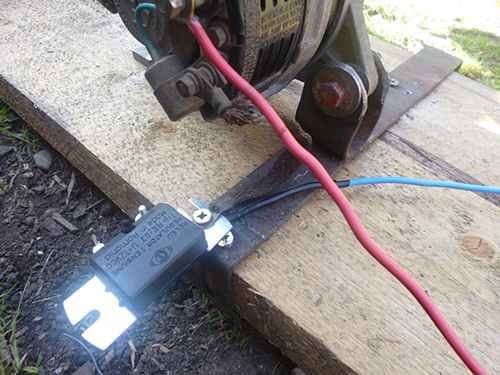
- Connect the switch (white wire) to the system with one end attached to the same spot on the alternator where the positive wire went. Connect the other one to the B+ (the right one) on the voltage regulator. Connect the motor to the regulator, and attach the wire to the DF on the regulator.
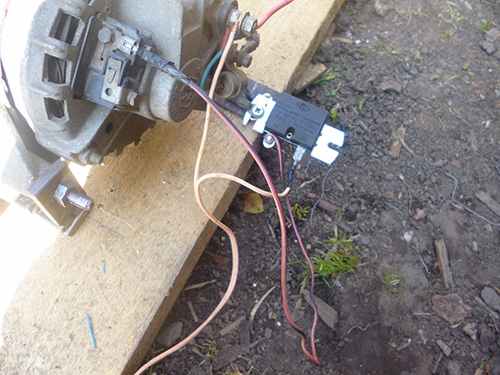
- Now the button should be functioning.
- Attach the positive and negative wires to the battery to finish.
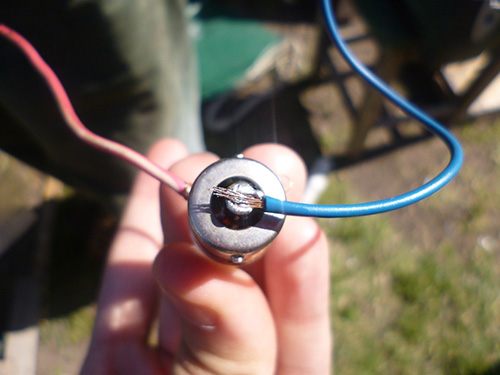
- To try out the system, I grabbed my soldering gun and the 12-volt light bulb. I first started out by wrapping the positive wire around the light bulb.
- Using the solder gun, I attached the negative wire to the bottom of the bulb.
I started pedaling the bike.
The light bulb lit up with ease. You can see that the light bulb isn’t attached to the battery. It is connected to the clamps of the inverter (which was turned off) and the multimeter to measure the amount we can make.
Depending on how hard you pedal, how strong the alternator is, and how big the bike wheel is, you could get different readings. I consistently got around 14–15 volts out of it.
I then put the clamps back onto the battery and turned the inverter on to see if I could light up the 110-volt light bulb.
You can see the light bulb on the ground and that the inverter is on.


 in Cereal?")

