

The Lady of the House worked extensively on the hides of our first two rabbit litters, and did a fantastic job. Much of the time, I was a secondary assistant doing what I’m told for anything else that happens. Given the insane life she has succeeded in getting most of the skins to a reasonably substantial level of success with the two hides nearly finished. That is what we were doing.
Step 1:
Wash the skinned hide. You are just trying to get the blood and dirt off the hide. We just dunked them all in a bucket of 5 gallons for us, and had a second one to rinse them off as we pulled them out one by one.
Step 2:
Take the rabbit’s raw, or green skin, and tackle it down on a board fur. We have plenty of plywood scraps around and for the rest we had a 4’x8 “sheet of OSB cut into 8, 2’x2′ squares. Make sure you firmly pulled it, as you do so. Since rabbit skin is so sensitive, we suggest using tack nails rather than something larger.
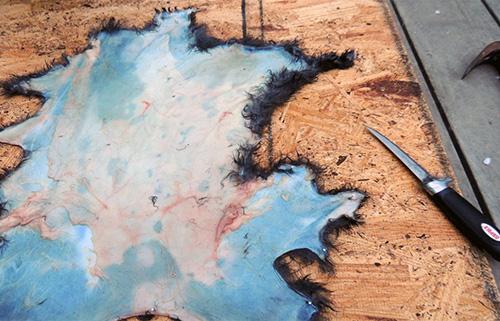
Because of my lack of experience in properly skinning rabbits, as you can see the skin is a bit ragged. The pink and quite lumpy bits are areas on the skin where there is either fat or pieces of flesh we couldn’t get off. We tried to flesh the hides as best as we could in our first attempt on this. In the future we will be salting first to reduce the damage we do to the hide while fleshing.
Related: 53 Plants & Herbs You Can Propagate From Cuttings
Step 3:
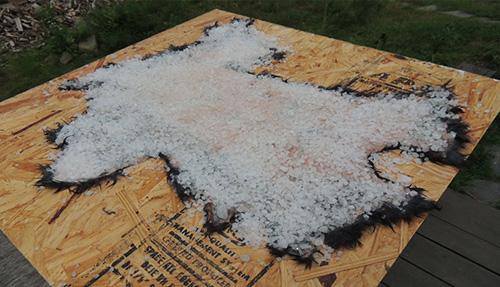
Salt the hide, this is a crucial move for us with our time reduced and dispersed. This protects the hide, so that it will not rot because we can not work on it. It also makes the hide much easier to flesh as we have learned the hard way! You put down a thick layer of salt that is completely sealed. You want the huge amounts of non-iodized salt. Just pure chloride made from sodium. Get what ever you can if you can afford it, that doesn’t have additives.
This is one of the first salted hides we’ve made. We used a LOT of salt as you can see.
Step 4:
Flesh the hide. You scrape off all the salt in this stage, and remove all the flesh and fat from the skin. Most of the time we did it by hand but spoons were a great aid. The Lady of the House got decent results by scoring the fat with a sharp knife, thus making sure they didn’t cut down on the skin below. You have to be careful, and you don’t have to get too far to get to the roots of the hair or you’ll lose the fur to fur slippage.
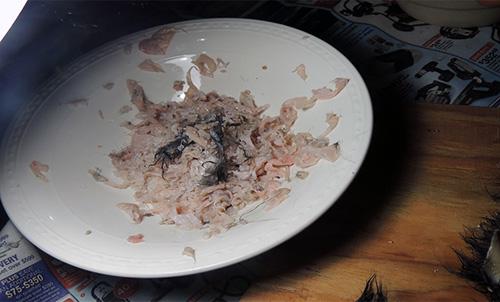
This is a bowl of fat-flesh blended scraps from the skins. Finding a better person to skin the rabbit would make this process far simpler from what I understand. I’m not skilled at skinning at this stage, unfortunately, which makes things even harder for us as we try to clean the hides. If you can’t finish fleshing out in one go, re-salt the hide and pack it away. Try not to leave it too long, they start to stink after a couple of days, and we believe that when this happens, they can also degrade in quality.
Step 5:
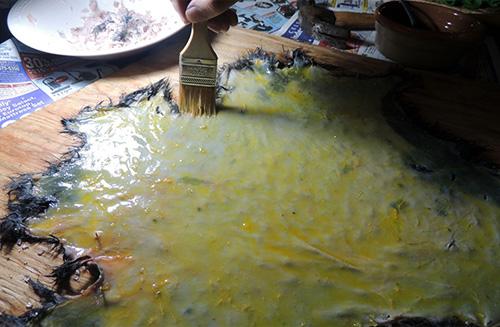
Use your tanning agent. In our case, egg yolk is mixed with a teaspoon of water, or two. We used a pastry brush to brush the mixture evenly on it. You have to be absolutely sure that you get an even coating all over the hide. You also need to make sure that you don’t get any of the fur-side eggs. This is a photo of me trying to get a good coverage at the edge of skin with the brush.
Related: How to Make Powdered Eggs at Home
Step 6:
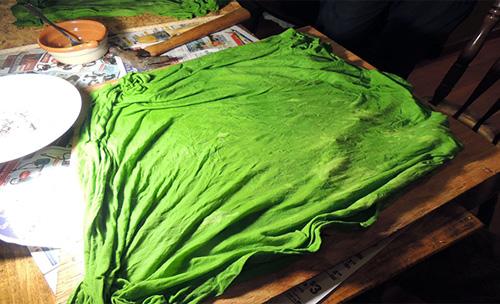
When the skin is well coated with the mix of egg yolk and water, cover the skin. You’ll need a damp rag to cover the skin, and make sure you cover it all. We used a beat up old collection of sheets, and the cotton jersey just seemed to do fine for that. We wet the sheet thoroughly, then mostly rung it out before placing it over the skin.
Step 7:
Wait. Set the covered skin aside. Most places say overnight. Many say 12 – 48 hours. We have been setting it aside for a fairly consistent 24 hours.
Step 8:
Carefully remove the skin from the board. Since we had used tack nails we just removed them gently and nailed them back into the board for reuse later.
Step 9:
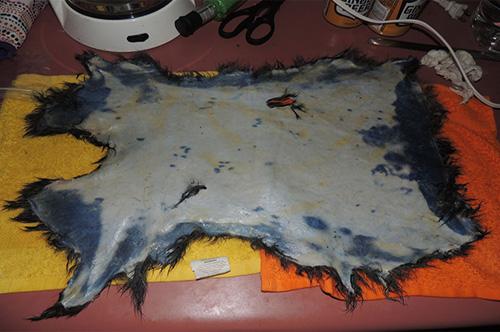
Take the skin that has been seated for about 24 hours, and wash it clean. You want to completely get the egg mixture off. This will also encourage you to get whatever crudity you skipped while doing your first wash.
You can see a layer above and below that has just been rinsed off. At this point, it doesn’t look very nice or glamorous and both the Lady of the House and I were a bit worried that we might have messed up something. However, other than the holes in the skin from one thing and another they’re doing just fine, from what we can tell.
Step 10:
Enable drying out the skin. I don’t mean letting this get dry bone. You have to let it heat up to the point that it’s hot. In the nasty humid weather, where we are, this takes a long time, and can be very frustrating if we leave the skins to dry for several days. But it is necessary not to try using heat to force drying. You can use a fan to blow air through it, but the hide can be harmed by something like a hair dryer or heating device. When it’s warm, pliable and just humid enough to feel cool you want to work with the skin.
Related: Short Term Emergency Food Supply List
Step 11:
Work the hide. This is the longest, but easiest part of the process for us so far. Work the hide by rubbing it over a rope, corner of a table, something relatively smooth. The Lady of the House uses the non clip end of a clip board. I’ve been using chair backs and my knee from time to time. In humid weather it takes for EVER.
From what we understand it takes much less time in a dry climate, or in the effects of air conditioning. Again, don’t use heat in this process. Just room temperature working. You have to work the hide until it is completely dry. If you don’t constantly work the hide it will end up hard as a board. If you have to stop mid work at this step, put the hide in a plastic bag in the fridge to keep it damp. You don’t want it drying out overnight on you and having to re soak and restart.
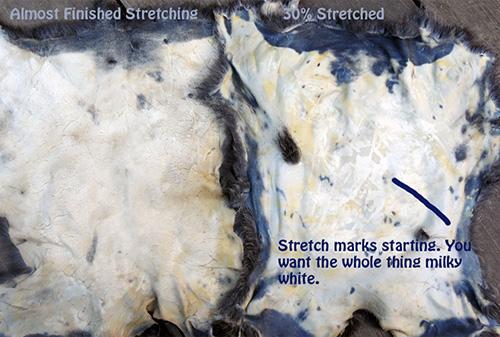
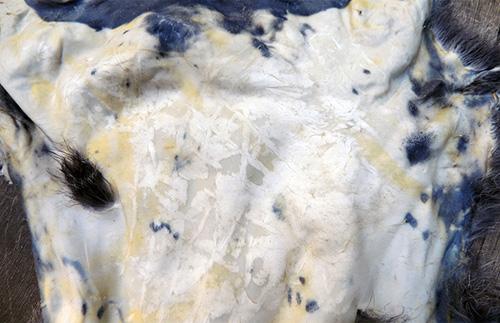
One of the things we had most difficulty with our first time was “How do we know when it is done?” Everywhere says that it will turn a milky white. Well, what exactly does that mean. Above the lady of the house has done a quick side by side comparison for ease of use.
Step 12:
Sew closed the holes in the hide. The nice thing about fur is that if the fur is good you can’t even see the stitching lines if you’re any good at sewing.
Step 13:
Trim the hide. Basically take off the ragged edges. We haven’t reached this step yet but will update with more information about it when we do.
Step 14:
Smoke the hide. We obviously haven’t gotten to this step yet. This step is to waterproof the hide. If you don’t do this step any time the hide gets wet you have to rework it, and that’s a pain in the ass. All we know now is to smoke over low heat so you don’t cook the hide. We are trying to, as we did with the rest of this tutorial gather as much information as we can and compile it in a way that makes sense to us to pass on to you. Smoking will probably be its own post in the future.


 in Cereal?")

